Whilst on maternity I discovered a love for baking. I loved trying out new recipes and then adapting them to my style, to make them more suitable for my little one (less sugar, no salt, substituting certain ingredients…). I especially enjoy helping out in Bake Sales for charity, and this is how I came up with this recipe.
Avocado is such a versatile fruit and a great source of goodness for your child; with vitamins, fibre and healthy fats. If you are not a huge avocado fan that is fine, you can’t really taste the avocado in this recipe but it does give the brownie a lovely texture and moistness. And with the combo of chocolate and raspberries you are on to a winner with this one! It is super yummy and guaranteed to get you lots of compliments, plus it has been a great success with kiddies at various party, and it’s very easy!
The trickiest part is making the chocolate sauce for the mixture (but fear not, it’s not that complicated). But once that is out of the way it is smooth sailing ahead!
So have a go at this and see what you think. It is also great fun to have your toddler help you out with mixing and “cleaning the spoon” (my son especially enjoys licking the spoon part), and adding the raspberries.

My personal spoon licking service
We’d love to hear your feedback with any comments, suggestions or questions.
Ingredients – Makes enough for 6-8 people, depending on how big/small you cut the brownies
Prepping: 30 minutes
Cooking: 25-30 minutes
- 1 pinch of salt (if you don’t want your child to have added salt just don’t add this)
- 65g Self-raising Flour
- 90g Golden Caster Sugar
- 3 Medium Eggs, at room temperature
- 150g Unsalted Butter, plus extra for greasing
- 130g Milk Chocolate
- 120g Dark Chocolate
- 1 ripe Avocado
- Fresh Raspberries for topping
Method
Measure all the ingredients out before starting.
1. Prepping the chocolate sauce: Cut the butter in to small chunks and add to a large heatproof bowl. Break all the chocolate in to pieces and add to the bowl.
2. Preheat the oven to 180 C / fan oven 160 C / Gas Mark 4. Grease a rectangular baking dish, measuring approximately 25cm x 20cm, with unsalted butter.
3. So here comes the tricky part. Melt the chocolate and butter “a bagnomaria”. It’s not as hard as it sounds and when you’ve done it once, you will know exactly what to do for next time. See our Techniques section if you’re unsure how to do this.
Make sure to regularly stir the ingredients with a wooden spoon until it’s all melted and lovely and smooth. You can do this whilst doing stages 4 and 5.
4. While the chocolate and butter are melting, prep the avocado (See our Techniques section if you’re unsure how to do this). “Smush” the avocado up with a fork on a chopping board, making a lumpy purée.

Make it all nice and smushy
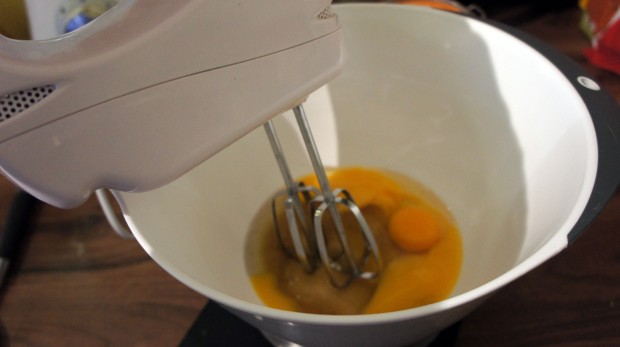
5. In a large mixing bowl, whisk the eggs and sugar together with a hand held electric whisker, for 2-3 minutes until light and airy. Then add the smushed up avocado and mix together gently with a hand held whisk, until smooth.

Mix it up!
6. Add the chocolate sauce to the egg mixture (careful it will be hot!), and stir with a hand whisk until combined. It will look lumpy but that’s because of the avocado.

Adding the chocolate sauce

Hmmm… Soooo chocolatey!
7. Add the flour and salt to the mixture, folding and stirring gently with a wooden spoon until combined.
8. Pour the mixture in to the greased dish. Roughly chop enough raspberries for topping (it’s up to you how many to use. I like to have a lot on there) and put the pieces evenly all over the top of the mixture.

Ready to go in the oven
9. Bake for 25-30 minutes in the centre of the oven. It will seem quite soft when you take it out of the oven, but it will harden whilst cooling, though still remain moist and gooey.
10. Allow to cool in the dish for 10 minutes. Then cut in to square pieces and move to a cooling rack to cool down further. It’s up to you how big to make them.
If I’m making them for a kiddies party, I tend to cut them in to smaller squares. But if it’s for your adult guests go for bigger sizes!

The house smells so good when this comes out of the oven!
The brownies will keep in an airtight container or covered with cling film until the following day. After 24 hours they will start to go a bit soggy, so it’s best to eat them all up before then!
I’ve never frozen these (there are never any leftovers when I make these!) so I’m not sure how well they freeze. But if you would like to experiment and feedback, we would like to hear your thoughts. Hope you enjoy and have fun with it!
P.S. I’m afraid there will be a lot of washing up to do after this… the unfortunate downside of baking… but the results will make it all worth the effort!
